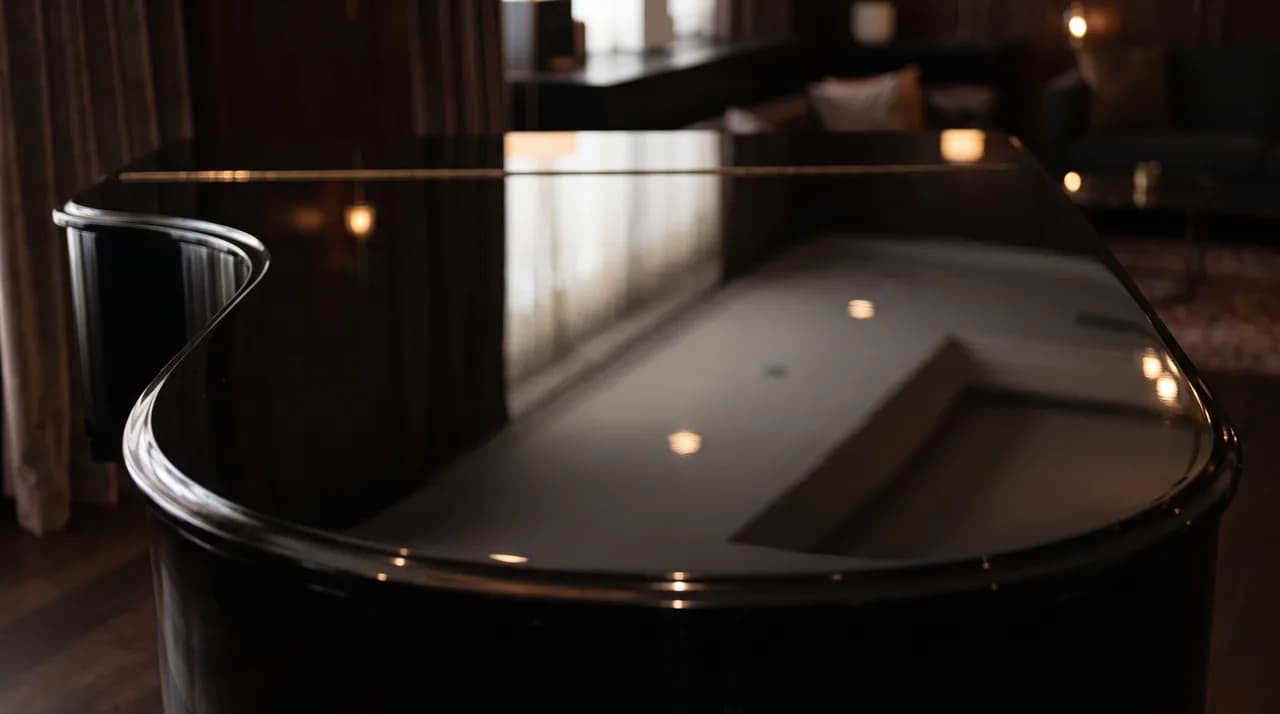
Walk into almost any listing with a statement piece of furniture – a black lacquered grand piano in the living room, a high-gloss kitchen island, a polished marble console – and you will notice something in the photos before you notice the furniture itself: a smear of blown-out white light sitting exactly where the object's most important lines should be. Reflective surfaces are, without exaggeration, the most technically demanding material category in real-estate visual media. They defeat point-and-shoot photography, they confuse structured-light and LiDAR scanners, and they punish anyone who tries to fix the problem purely in post-production.
This is not a niche concern. High-gloss finishes have become a design staple in premium residential and commercial interiors precisely because they read as luxurious in person. The irony is that the same optical properties that make them look expensive in a room make them nearly impossible to capture faithfully with a camera or a scanner. Understanding why requires a short detour into what a "reflective surface" actually does to light, because the fix follows directly from the physics.
Why Gloss Breaks Ordinary Capture Methods
Matte surfaces scatter incoming light diffusely in every direction, which is exactly what makes them easy to photograph and easy to scan: a sensor positioned almost anywhere receives a reasonably consistent, predictable amount of light back from the surface. A high-gloss lacquer, polished stone, or piano finish behaves almost like a mirror instead. Most of the light striking it does not scatter – it reflects at a sharp, specific angle. From the camera's point of view, this produces two distinct failure modes depending on where the reflection happens to land.
Where a bright light source is mirrored directly back at the lens, the sensor receives an enormous, concentrated burst of light – far more than any correctly exposed part of the scene. This is a specular highlight, and it clips to pure white almost instantly, destroying all detail in that patch regardless of how carefully the rest of the frame is exposed. A few centimeters away, where no light source happens to be reflected toward the camera, the same physically glossy surface can read as almost black, because it is reflecting empty space or a dark ceiling rather than scattering ambient light back evenly. The result is a surface that swings from blown-out white to near-black within the same object, with no smooth gradient in between – something no single exposure setting can reconcile.
3D scanning suffers a parallel but distinct problem. Structured-light and laser-based scanners work by projecting a known pattern onto a surface and measuring how that pattern deforms to calculate depth. A mirror-like surface does not return the projected pattern to the sensor in a usable way at all; instead it redirects the light elsewhere, often bouncing it onto a nearby wall or back into the scanner's own housing. The scanner either records no data at that point, producing a hole in the mesh, or it records phantom points reflected from something else entirely, producing spikes and noise that were never physically part of the object.
What This Looks Like in a Point Cloud
On a matte sofa or a plastered wall, scan data is dense, consistent, and easy to clean. On a lacquered piano lid or a glass-fronted display cabinet, the same scan pass typically returns one of three artifacts. The first is simple data dropout – a hole exactly where the surface was most reflective, because no usable return signal came back. The second is a scattering of stray points floating in front of or behind the actual surface, caused by multi-path reflections bouncing between the object and its surroundings before returning to the sensor. The third, and most deceptive, is a smoothly interpolated but subtly wrong surface, where the scanner's own noise-reduction algorithms fill gaps with an averaged guess that looks plausible in the mesh viewer but does not match the real geometry.
This last case is the one that causes the most downstream trouble, because it does not look like an error. A slightly rounded piano edge or a softened cabinet corner can pass an initial quality check and only becomes obvious once the model is compared against reference photography or measured on site. Experienced operators learn to distrust any patch of unusually smooth, unusually clean geometry on a known-reflective object – in scanning, suspiciously perfect data on a difficult material is itself a warning sign.
The practical consequence is that raw scan output on high-gloss items almost always needs targeted intervention rather than a single global cleanup pass. Blanket noise filters applied across an entire room will either fail to remove the reflection artifacts on the piano while degrading legitimate detail elsewhere, or they will smooth over the artifacts in a way that quietly falsifies the object's true shape.
Lighting Setup: Diffusion Before Anything Else
Because the underlying problem is a highly directional reflection, the most effective fix happens before a single frame is captured or a single scan pass is run: change what the surface is reflecting. A bare light source pointed at a lacquered piano will always produce a hard, small, blown-out highlight, because the surface is doing exactly what a mirror does – showing a sharp image of the light itself. Replace that same light with a large diffusion panel, a bounced softbox, or even a section of white foam board held just out of frame, and the surface now reflects a broad, evenly lit area instead of a point source. The highlight does not disappear, but it spreads into something the sensor can actually record with detail intact.
Scale matters more than intensity here. A large, soft light source positioned relatively close to the reflective object produces a gentler, wider highlight than a small, harsh source further away, even at identical output. This is why professional product photographers shooting glossy cars, pianos, and appliances build entire tents of diffusion material around the subject rather than relying on a single key light – the goal is to control everything the surface can possibly reflect, not just the one light aimed at it.
Angle changes are the second lever, and they matter for both photography and scanning. Because reflections are directional, a small shift in camera position or scanner placement can move a highlight or a data gap entirely off the critical part of the object. A grand piano's curved lid, in particular, reflects different parts of the room at different points along its curve, so a single position that looks clean on one section may be disastrous three feet further along. Professionals routinely shoot the same glossy object from several slightly offset positions specifically so that retouching or scan-merging can pull the cleanest data from whichever angle happened to avoid the worst reflection at each point.
Polarizing Filters and Their Real-World Limits
A circular polarizing filter is the standard photographic tool for taming reflections, and it earns its reputation: rotated correctly, it can significantly reduce specular glare on non-metallic glossy surfaces such as lacquered wood, painted furniture, and glass. The filter works by blocking light waves oscillating in the plane of the reflection while passing the rest, which is why its effect is strongest at roughly a 30-to-40-degree angle to the surface and essentially absent when shooting straight-on or at a glancing angle.
The limits are just as important as the benefit. Polarizers reduce reflected glare from non-conductive materials but do very little for metallic or metallic-finish surfaces, where the reflection is not polarized in the same way – brushed steel appliances and metallic-flake lacquers barely respond. They also cost roughly one to two stops of light, which matters in interior shots already relying on longer exposures or higher ISO. And because the optimal rotation angle depends on the specific geometry between light source, surface, and camera, a single filter setting that eliminates glare on one section of a piano lid may do nothing for another section reflecting a different part of the room.
For 3D scanning, physical polarizing filters are far less commonly deployed directly on the scanner optics, since most consumer and prosumer scanning rigs are not designed to accept them, and doing so can interfere with the wavelength or pattern the scanner depends on. Instead, the polarizer's job on a scan-heavy shoot is usually handled during the manual photographic supplement rather than during the scan pass itself – a distinction worth making explicit, because it clarifies why scanning and photography are treated as two separate workflows on these objects rather than one.
HDR Bracketing: Necessary but Not Sufficient
Standard HDR bracketing – capturing several exposures of the same frame at different shutter speeds and blending them – is essential for high-gloss interiors, but it solves a narrower problem than people often assume. Bracketing recovers detail across a wide dynamic range: it lets you retain window views, room shadows, and mid-tone furniture in the same composite image. What it does not reliably fix is a hard specular highlight, because that highlight is often blown out even at the darkest bracket in a typical three- or five-shot sequence. A grand piano lid photographed at -2, 0, and +2 stops may still show a pure white patch at -2 stops if the reflected light source is bright enough.
The practical response is to extend the bracket range specifically for gloss-heavy scenes – adding an extra frame at -3 or -4 stops purely to recover the highlight detail, even though that frame would be far too dark to use anywhere else in the blend. This frame is rarely blended automatically by HDR software; it is usually pulled in manually during retouching, masked in only over the specific highlight region, because an automated blend algorithm applied globally will often reintroduce the same problem by favoring the mid-range exposures across the whole surface.
Bracketing also cannot fix the two-tone problem described earlier – the swing from near-white to near-black across the same physical surface caused by directional reflection rather than genuine underexposure. No number of brackets recovers detail that was never scattered toward the camera in the first place. That gap can only be closed by changing the lighting setup itself, which is why bracketing is treated as a necessary complement to diffusion and repositioning rather than a substitute for them.
Retouching Techniques That Actually Preserve Realism
Once captured material is in hand, retouching high-gloss surfaces is a deliberately restrained process, because the easiest mistakes are the most visually damaging ones. The most common error is over-correcting a highlight into a flat, matte-looking patch – pulling the exposure down until the blown-out area matches the surrounding tone, but in doing so erasing the very reflection that told the viewer's eye "this is glossy." A lacquered piano with no reflections at all reads as flat and painted rather than lacquered, which defeats the purpose of showing the material honestly.
The more reliable approach is to reduce a highlight's size and intensity rather than eliminate it, keeping a smaller, softer bright patch that still communicates gloss while no longer clipping to pure white. This typically involves compositing in detail from a darker bracket exposure specifically within the highlight, then feathering the mask edges heavily so no visible boundary appears between the corrected patch and the surrounding surface. Local contrast and clarity adjustments are kept minimal on these surfaces, since gloss already carries strong micro-contrast naturally, and pushing it further tends to introduce a halo or an artificial sheen that photographs poorly.
For 3D-scanned assets, retouching takes a different form entirely: it happens at the mesh and texture level rather than in a 2D image. Gaps in the point cloud caused by reflection dropout are filled using reference photography of the same object taken from multiple angles, effectively triangulating the true surface geometry rather than letting the scanning software's own interpolation guess at it. Texture maps derived from photography are then applied over the corrected mesh, since scanners generally cannot capture accurate color and reflectivity information on glossy materials even when the geometry itself is eventually recovered.
When Manual Photography Must Supplement the Scan
There is a threshold, encountered on almost every project involving a grand piano, a glass display cabinet, or heavily lacquered custom furniture, past which scan data alone cannot be trusted regardless of how much cleanup is applied. The decision to bring in manual photographic supplementation is usually triggered by three signals working together: persistent holes in the mesh that reappear across multiple scan passes and positions, visibly implausible geometry such as unnaturally smoothed corners or curves that do not match the object seen by eye, and any surface where accurate color or texture is required for the final render but the scanner's texture capture is clearly unreliable on that material.
In practice this means treating the scan as a geometry-first pass covering the bulk of the room accurately, while the glossy object itself is captured separately with a dedicated photographic session – multiple angles, controlled diffusion lighting, bracketed exposures, and in some cases a polarizing filter – and then either projected onto the scanned mesh as a texture or, for smaller objects like a piano, modeled or corrected as a semi-manual asset that gets composited into the scan-derived scene. This hybrid workflow costs more time than a single scan pass, which is exactly why it is reserved for objects that demonstrably need it rather than applied as a blanket precaution across every reflective surface in a listing.
Recognizing which objects cross that threshold is itself a skill built from experience: a glossy kitchen worktop under even, diffused ambient light might scan acceptably, while the same finish under a single downlight will not. The decision is made on site, in real time, by evaluating live scan feedback against the object rather than by rule of thumb, which is one of the reasons this kind of judgment call remains difficult to fully automate.
Practical Takeaways for Property Owners and Agents
None of this needs to be managed by the client commissioning the visualization, but understanding it helps set realistic expectations. A grand piano, a glass coffee table, or a high-gloss kitchen will always take measurably longer to capture correctly than the rest of a room, and that time is not wasted effort – it is what prevents a listing photo from showing a white blob where a beautiful instrument should be, and what prevents a 3D walkthrough from showing a piano with a subtly wrong, slightly melted-looking lid.
Where possible, simple staging choices help: reducing the number of small, hard light sources (spotlights, uncovered bulbs) in a room with major reflective furniture, and allowing the visual media team flexibility to reposition a lamp or close a blind temporarily during the shoot, both make a measurable difference to the final result without any cost to the property owner.
Conclusion
High-gloss surfaces sit at the genuine edge of what current photographic and 3D-scanning technology can capture reliably, because the physics of specular reflection actively works against both a camera sensor's dynamic range and a scanner's structured-light measurement. The dependable fix is never a single trick – it is diffusion-first lighting, deliberate camera and scanner repositioning, extended HDR bracketing aimed specifically at highlight recovery, restrained and detail-preserving retouching, and a clear-eyed willingness to fall back on dedicated manual photography whenever a scan cannot be trusted. Treated this way, even a black lacquered grand piano or a mirror-polished stone counter can be represented in a listing exactly as impressively as it looks in the room.