A construction site is never the same place twice. Between one site meeting and the next, foundations get poured, walls go up, scaffolding moves, and materials that were visible on Monday are covered by drywall on Friday. This constant state of change is exactly what makes construction sites so hard to document informally — and exactly why systematic, technology-supported documentation has become a core requirement rather than a nice-to-have.
For construction companies, the stakes are contractual: proof of completed work stages, evidence for change orders, and a defense against unjustified defect claims. For property managers and developers, documentation protects the long-term value of the asset and provides a factual record for future maintenance decisions. For architects, it is the bridge between design intent and built reality, and increasingly the raw material that feeds into BIM models and facility management systems. In all three cases, the underlying problem is the same: without a deliberate, repeatable method, critical visual evidence disappears behind the next phase of construction and can never be recovered.
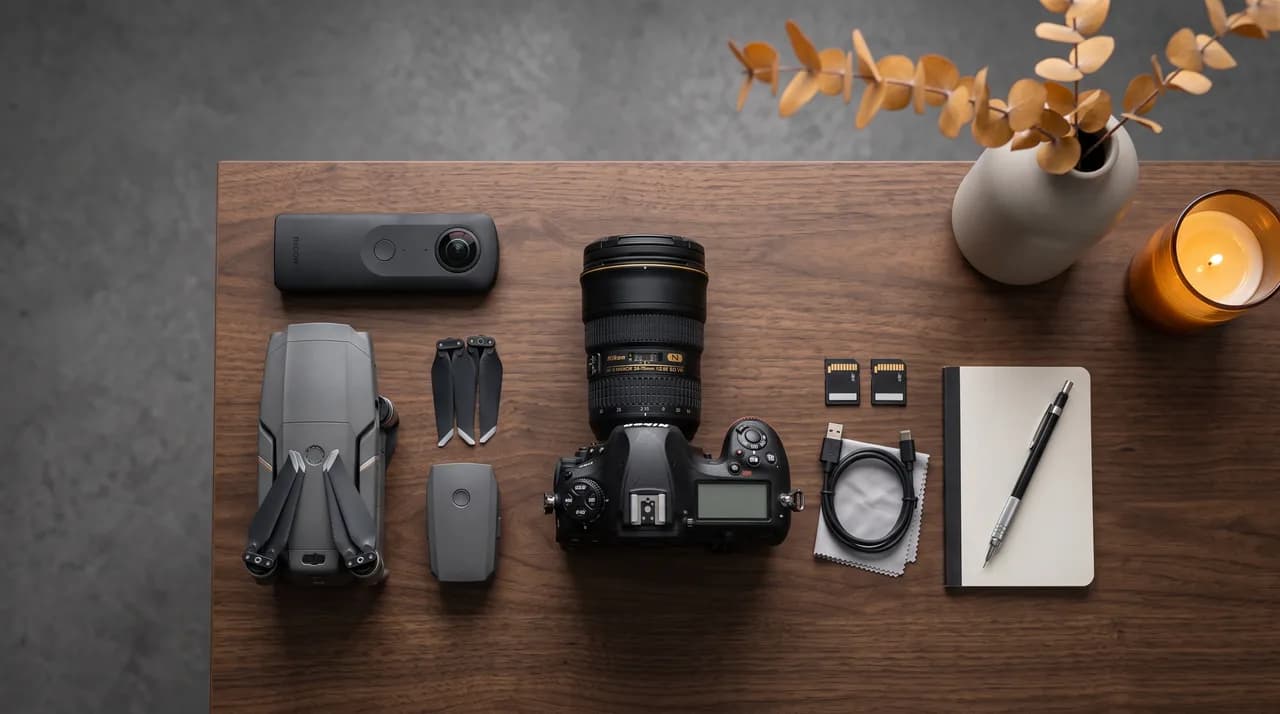
This article walks through why ad-hoc phone photography falls short, how DSLR, drone, and 360° technology each solve a different part of the documentation problem, and how to combine them into a workflow that produces evidence you can actually rely on — legally, contractually, and technically — months or years later.
Why Plain Phone Photos Aren't Enough
It is tempting to think that construction documentation is solved the moment someone on site has a smartphone. In practice, phone photography creates the illusion of documentation without delivering its substance. The first problem is metadata. Many phones strip or inconsistently record GPS coordinates, timestamps, and camera orientation, especially once images are compressed and forwarded through messaging apps. A photo that has passed through a chat thread a few times may carry no reliable timestamp at all — which is precisely the piece of information you need most when a dispute arises over when a defect appeared or when a work stage was actually completed.
The second problem is standpoints. Phone photography is opportunistic: whoever happens to be on site takes a picture from wherever they happen to be standing, at whatever angle looks reasonable in the moment. Three months later, when you want to compare the state of a facade or a mechanical room to a previous visit, there is no way to line up the images. Different angles, different lenses, different lighting, different distances — the comparison becomes qualitative guesswork rather than a defensible before-and-after record. Courts, insurers, and clients increasingly expect documentation that can be compared frame-for-frame, not a loose folder of snapshots that merely gestures at what the site looked like.
The third problem is coverage and consistency. A single person walking a site with a phone will document what catches their eye — an obvious defect, an interesting structural detail — while missing the systematic, wall-by-wall or room-by-room coverage that later stages of a project actually require. When drywall goes up over concealed plumbing and electrical runs, for example, the absence of comprehensive photographic coverage at the right moment cannot be fixed later. The work is simply lost to view. Reliable documentation requires a method that is repeatable regardless of who is holding the camera, and phone photography, however convenient, rarely delivers that discipline.
DSLR Photography for Detail and Defect Documentation
Where phone cameras fall short on consistency and quality, a DSLR or mirrorless camera with proper glass earns its place on site. High-resolution sensors and interchangeable lenses allow a documentation team to capture the level of detail that actually matters in construction: hairline cracks, weld seams, insulation gaps, moisture staining, connection details, and finish quality. When a defect claim depends on whether a crack was 0.2mm or 2mm, or whether a seal was properly applied before it was covered, resolution and lens quality are not cosmetic preferences — they determine whether the photo can serve as evidence at all.
DSLR documentation also benefits from manual control over exposure, white balance, and depth of field, which matters enormously in the mixed and often poor lighting conditions typical of construction sites: dim basements, glare off wet concrete, unlit shafts and risers. A camera that can be set up correctly for these conditions, ideally supplemented with a tripod and consistent lighting for repeat shots, produces images that hold up to scrutiny regardless of the site's ambient conditions on a given day. Wide-angle lenses are useful for capturing full rooms and structural context, while macro or telephoto options let a documentation specialist get close to a defect without disturbing scaffolding, protective covering, or fragile surfaces.
Critically, DSLR photography is the right tool when the goal is to build an evidentiary record of specific, granular details rather than a general spatial overview. Defect logs, snagging lists, quality assurance checkpoints, and material verification (correct product, correct thickness, correct fastening pattern) all benefit from targeted, high-resolution stills taken at defined checkpoints in the schedule. This is detail work, and it complements — rather than replaces — the broader spatial and progress documentation that drones and 360° capture provide.
Drone Imagery for Roofs, Facades, and Progress Tracking
Some parts of a construction site are simply inaccessible or unsafe to document from the ground: roof surfaces, upper facade sections, large-scale earthworks, and the overall footprint of a site during excavation and shell construction. This is where drone imagery earns its keep. A drone equipped with a good camera can capture roof coverings, flashing details, and rooftop mechanical installations without anyone having to climb scaffolding or work at height — reducing both cost and risk while producing a far more complete visual record than any ladder-based inspection could.
For facades, drones allow a documentation team to capture full elevations at consistent altitude and angle, which is invaluable for tracking cladding installation, window and door integration, and scaffolding removal sequences. Because a drone can be flown along the same flight path on repeat visits, facade progress becomes directly comparable over time — an oblique aerial equivalent of the fixed standpoint principle that underpins good documentation generally. This is particularly useful for larger commercial or multi-unit residential projects, where ground-level photography alone cannot capture the full scale of the building.
Drone imagery is equally valuable for overall progress tracking. A periodic aerial pass over the whole site — captured at the same time of day, from the same approximate altitude and orientation — creates a time-lapse-like record of grading, foundation work, structural progress, and site logistics (material staging, crane positioning, access routes). This has real commercial value beyond documentation: aerial progress imagery is commonly used in investor updates, marketing materials, and internal project reviews, in addition to its role as a contractual and legal record. For property managers overseeing multiple ongoing projects, aerial progress documentation also provides an efficient way to review site status without a physical visit.
360° Technology for Full Spatial Documentation
DSLR photography captures detail, and drone imagery captures scale and areas that are hard to reach — but neither, on its own, preserves the complete spatial context of an interior space at a given moment. This is the gap that 360° scanning technology fills. Using a 360° camera or a structured scanning system, a documentation team can capture an entire room, floor, or utility corridor as a navigable, immersive record that lets anyone — an architect, an insurer, a facility manager — virtually walk through the space exactly as it existed on the day of the scan.
The practical advantage here is completeness. A single 360° capture at a fixed point records everything visible from that position simultaneously: wall finishes, ceiling conditions, floor coverings, MEP routing, structural elements, and their spatial relationships to one another. Nothing is missed because the operator was looking the wrong way. This is especially valuable for documenting conditions immediately before they are concealed — for example, a full scan of a mechanical room or a stud wall cavity with rough-in plumbing and electrical visible, captured just before insulation and drywall go up. If a dispute or a renovation question arises years later about what is actually behind a wall, the 360° scan is often the only record that can answer it definitively.
360° documentation also supports direct comparison over time in a way that is more intuitive for non-technical stakeholders than a folder of stills. Because scans are tied to fixed points in a floor plan, a viewer can select the same location at different project stages and see the space evolve — excavation, structural shell, MEP rough-in, finishes, handover — without needing to interpret disconnected photographs. For handover documentation specifically, a complete 360° walkthrough of every space gives the property owner or manager a permanent, explorable record of the building's as-built condition, which has obvious value for future maintenance, insurance claims, and tenant fit-out planning.
Choosing the Right Tool Mix Per Project Phase
No single technology covers every project phase equally well, so the practical question for a project team is not "which tool should we use" but "which combination, at which stage." During excavation and groundworks, drone imagery does most of the heavy lifting: it captures site topography, excavation depth and extent, groundwater conditions, and the position of temporary works, all from a vantage point that ground-level photography cannot match. A handful of DSLR close-ups of soil conditions, shoring details, or utility connections rounds out the record.
During shell construction, the priority shifts toward documenting structural elements before they are covered — rebar placement, concrete pours, structural steel connections, and waterproofing details. This is where DSLR photography, taken methodically at each pour or structural milestone, becomes the backbone of the record, supplemented by 360° scans of larger spaces such as basements, parking structures, or mechanical rooms where full spatial context matters as much as individual detail. Drones continue to track overall progress and facade envelope work in parallel.
Fit-out is where 360° technology becomes dominant. As rough-in work is completed and concealed behind finishes, a complete 360° scan of every space captures the exact routing of plumbing, electrical, and HVAC before drywall closes it off — arguably the single highest-value documentation moment in the entire project, since this information becomes effectively unrecoverable once finishes are installed. DSLR photography remains important for finish-quality checks and snagging lists. Finally, at handover, the full toolkit converges: a complete 360° walkthrough of the finished building, DSLR detail shots of any outstanding defects or warranty items, and a final drone pass capturing the completed roof and facade. Matching technology to project phase, rather than defaulting to one tool throughout, is what makes the resulting documentation both efficient to produce and genuinely useful later.
Building a Recurring Documentation Workflow
The value of construction documentation compounds when it is systematic rather than sporadic, and the easiest way to guarantee that is to tie documentation visits directly to the existing rhythm of the project. Rather than treating documentation as an occasional, discretionary activity, the most reliable approach is to schedule it around site meetings that are already happening — weekly progress meetings, milestone inspections, and pre-pour or pre-cover walkthroughs. This ensures documentation actually happens (it is attached to an event that is already on the calendar) and that it happens at the moments when it matters most, immediately before concealment or immediately after a defined work stage is complete.
Equally important is establishing fixed routes and standpoints that are repeated on every visit. A documented route through the site — the same sequence of rooms, the same corridor, the same exterior walking path — combined with marked or recorded camera positions, turns each visit into a directly comparable data point rather than an isolated snapshot. This is what allows a project manager to look at week 4 and week 12 documentation side by side and see, unambiguously, what has changed. Establishing this route early, ideally at the project kickoff, and keeping it consistent even as the site itself changes shape, is one of the highest-leverage decisions a documentation program can make.
File Organization and Timestamps for Legally Sound Evidence
Capturing good documentation is only half the job; the other half is organizing it so that it remains usable — and defensible — when it is needed months or years later. Every file should carry an unambiguous timestamp and, wherever possible, embedded GPS metadata that ties it to a specific location on the site plan. This is not a bureaucratic nicety: in a dispute over when a defect occurred or whether a contractual milestone was met on time, the difference between metadata-verified timestamps and a filename someone typed manually can determine whether the evidence holds up.
A consistent folder and naming structure — organized by date, project phase, and location — makes documentation retrievable under pressure, which is exactly when it tends to be needed: during a dispute, an insurance claim, or an urgent facility management question. Raw files should be preserved unaltered as the authoritative record, with any edited or annotated versions kept separately and clearly labeled as derivative. Where the project or jurisdiction calls for it, a chain-of-custody log — who captured the images, when, and how they were transferred and stored — adds another layer of defensibility. None of this needs to be complicated, but it does need to be consistent from day one, because retrofitting an organizational system onto months of unsorted files is far harder than establishing one before the first photo is taken.
Integration into Project Management and BIM Systems
Construction documentation delivers its full value only when it is connected to the systems where decisions actually get made. Increasingly, that means linking photographs, drone imagery, and 360° scans directly into project management platforms and BIM models, rather than storing them in a separate, disconnected archive that nobody consults unless a problem arises. Many project management tools now support attaching dated site imagery directly to specific tasks, milestones, or locations within a project timeline, which means a superintendent reviewing a schedule delay can immediately see the visual evidence tied to that specific task.
For architects and larger developments, tying 360° scans and photographic documentation to coordinates within a BIM model creates a powerful cross-reference: anyone reviewing the model can pull up the actual as-built condition at a given point, rather than relying solely on the design intent captured in the model itself. This is particularly valuable for facility management after handover, since building operators can consult both the design model and the real photographic record of what is actually behind a wall or above a ceiling. Setting up this integration takes some upfront planning — establishing consistent location referencing between the documentation system and the model — but it turns documentation from a passive archive into an active tool that project teams actually use throughout the building's lifecycle.
Conclusion
Construction sites do not wait for anyone, and the visual evidence of how a building came together — what was behind the wall before it was closed, what the roof looked like before final flashing, what the facade progress was in week six versus week twenty — either gets captured systematically or is lost for good. Phone photography alone cannot deliver the consistency, metadata reliability, or comprehensive coverage that construction documentation genuinely requires. DSLR photography, drone imagery, and 360° technology each address a different part of the problem: fine detail and defect evidence, aerial scale and hard-to-reach surfaces, and complete spatial context, respectively. Used together, matched deliberately to each project phase, and tied to a recurring schedule with consistent standpoints, they produce a documentation record that is not just thorough but genuinely defensible — for contractual disputes, insurance claims, facility management, and the long-term value of the asset. Building that workflow takes some upfront discipline, but the alternative — trying to reconstruct what a space looked like after it has already been built over — is rarely possible at all.